Let’s start with a familiar situation.
You land on a website and immediately think, “This looks clean. I wish my site looked like this.”
Not to copy the business. Not to steal content. Just the layout, structure, and overall feel.
That thought is more common than most people admit.
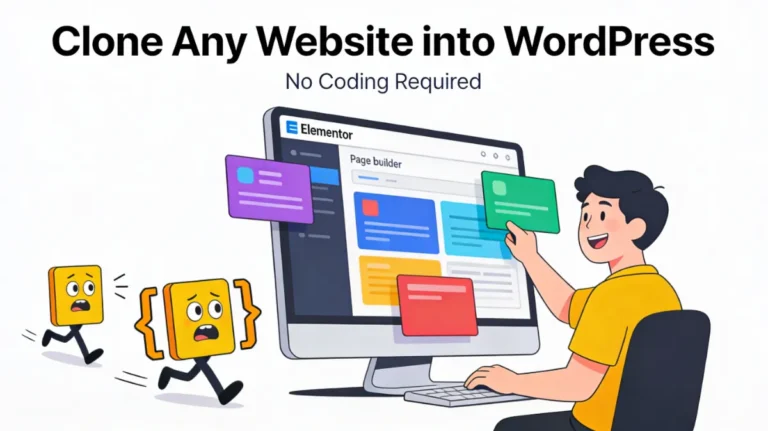
Design inspiration is how the web has always worked. The difference today? You don’t need to be a developer or touch a single line of code to recreate that look inside WordPress.
This guide walks you through a practical, beginner-friendly way to clone a website’s design into WordPress using Elementor—for free, and without coding. It’s especially useful if you’re redesigning a site, migrating from an AI website builder, or learning by rebuilding real-world layouts.
Quick note: we’ll also talk about what cloning actually means, what’s ethical, and where to draw the line. That part matters.
People want to clone websites for different reasons.
Sometimes it’s a freelancer trying to speed up a client project.
Sometimes it’s a business owner unhappy with their AI-generated website and wanting more control.
Other times, it’s just someone learning WordPress who wants to understand how good layouts are actually built.
The problem?
Most tutorials make this sound complicated.
And that’s where beginners freeze.
Here’s the reality: you can recreate the visible design of most websites inside WordPress using Elementor, without touching code and without expensive tools.
This guide shows you exactly how.
We’ll use a free tool, keep things realistic, and explain the limits clearly—so you know what this method is great at, and where it’s not.
Ethics and legality? We’ll cover that properly later, not in fine print.

Let’s clear this up early, because this is where most confusion starts.
Cloning a website does not mean hacking.
It does not mean copying databases, stealing backend logic, or bypassing security.
In this context, cloning means:
Think of it like rebuilding a house by looking at the exterior—not stealing the plumbing or electrical plans.
What does get cloned
What does not get cloned
Here’s the thing most people miss:
Cloning is about learning, redesigning, or migrating—not duplicating someone’s business.
When is cloning legally and ethically acceptable?
We’ll go deeper on this later, but keep this framing in mind as you read.
You don’t need a long tech stack here. Just three things.

This is the core tool.
Clone Web X allows you to capture a live webpage and convert it into editable page-builder content.
What it does well:
Free vs Pro (quick overview):
No hype here. It’s a utility tool, not magic.
WordPress + Elementor
Elementor is what makes this practical.
Why Elementor works best:
Important: Elementor Free is enough for this process.
You don’t need Elementor Pro just to import and edit layouts.
Chrome Extension Requirement
The cloning happens inside your browser.
That’s why a Chrome extension is needed—it reads the fully loaded page, not just raw HTML.
Browser-based cloning is essential because:
This is the core of the tutorial. Take it step by step. Don’t rush.

Not every website is ideal.
Good candidates:
Be cautious with:
Tip: Start with one page. Usually the homepage.
Also, make sure the page is fully loaded—scroll slowly, let animations finish.
Once inside:
This sets up a container where your cloned pages will live.
Nothing fancy here. Just basic setup.

Install the official Chrome extension.
Why this matters:
Permission concerns? Reasonable question.
The extension needs access only to the page you choose. It’s not scraping your browser history.
Now the interesting part.
You’ll see confirmation once the page is captured.
If something looks missing later, it usually means the page didn’t fully load during this step.
Now we move into WordPress.
Step 6 – Install Required WordPress Plugins
Inside your WordPress dashboard, install:
Compatibility note:
Once installed, activate both plugins.
Here’s where it comes together.
Quick check:
If yes, you’re good.
If not, don’t panic—we’ll cover fixes later.
This step separates rebuilding from copying.
Preview the page carefully.
Common tweaks you’ll need:
Let’s be honest—never publish a cloned page as-is.
Why this matters:
Change headlines. Rewrite copy. Adjust sections.
Use the layout as a foundation, not a final product.
Once you’re happy:

Common beginner mistake:
Double-check after publishing.
The process is the same.
Clone one page at a time:
Inside Clone Web X:
Inside WordPress:
Pro tip: Clone structure first, content later. It keeps things clean.
Let’s keep this honest.
Free version
Pro version
Required if you want to export layouts to:
Unlocks higher limits and full builder compatibility
Makes sense for freelancers, agencies, and anyone doing real client or migration work.
Important tip:
If you use the special link shared in this guide, you can get access to Clone Web X for $10, which allows you to:
That’s a solid deal if you’re planning to rebuild or migrate multiple sites into WordPress with Elementor.
Best Offer
Get access to Clone Web X for $10 & Clone 30 Websites on Elementor
This deserves attention.
Do not:
Use cloning for:
Best practice:
Cloning is a starting point, not an end.
Things won’t always be perfect.
Layout breaks after import
Missing images or fonts
Responsiveness issues
Plugin conflicts
Most issues are visual—not structural.

This approach works well for:
If you want full backend replication, this isn’t the method.
If you want fast, editable, no-code design recreation, it fits perfectly.
Cloning a website into WordPress doesn’t have to be complicated.
With the right tool, Elementor, and a clear understanding of boundaries, you can recreate layouts, learn faster, and move projects forward—without writing code.
The key takeaways:
Used responsibly, this method saves time and lowers the learning curve. It’s the same workflow many professionals quietly use.
At UpCrawlMedia, we often work with WordPress and Elementor-based builds where speed, flexibility, and clean structure matter—but regardless of who builds your site, understanding how these things work puts you in control.
